Why We Use Hybrid Enclosures
For years the default advice was "chameleons need full screen cages". That advice came from a real problem. Glass tanks with poor airflow cause respiratory infections, so the hobby moved to full screen and overcorrected. A fully screened enclosure in a dry house is almost impossible to keep humid enough, and you end up misting constantly to chase a number you can never hold.
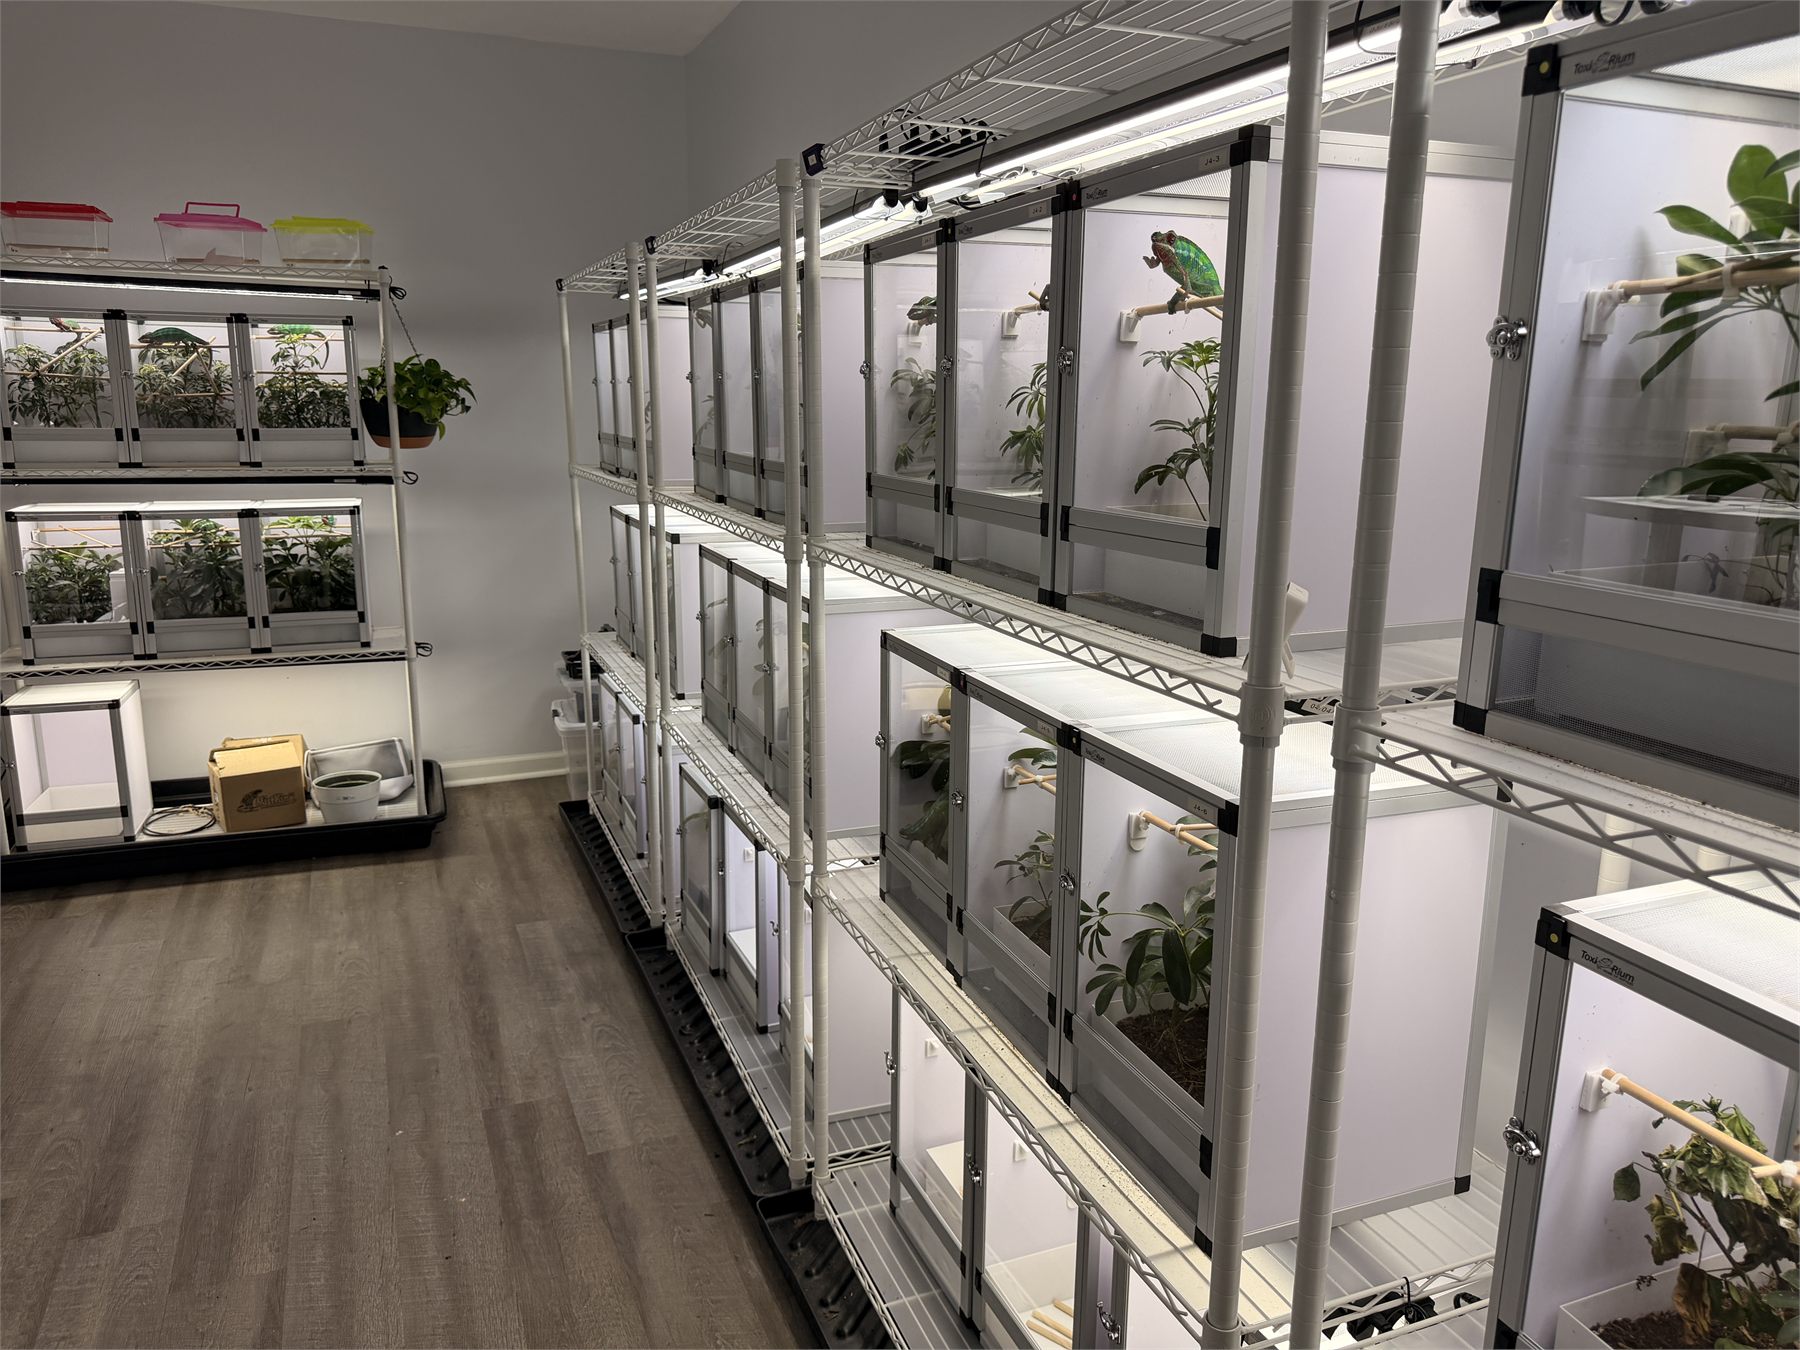
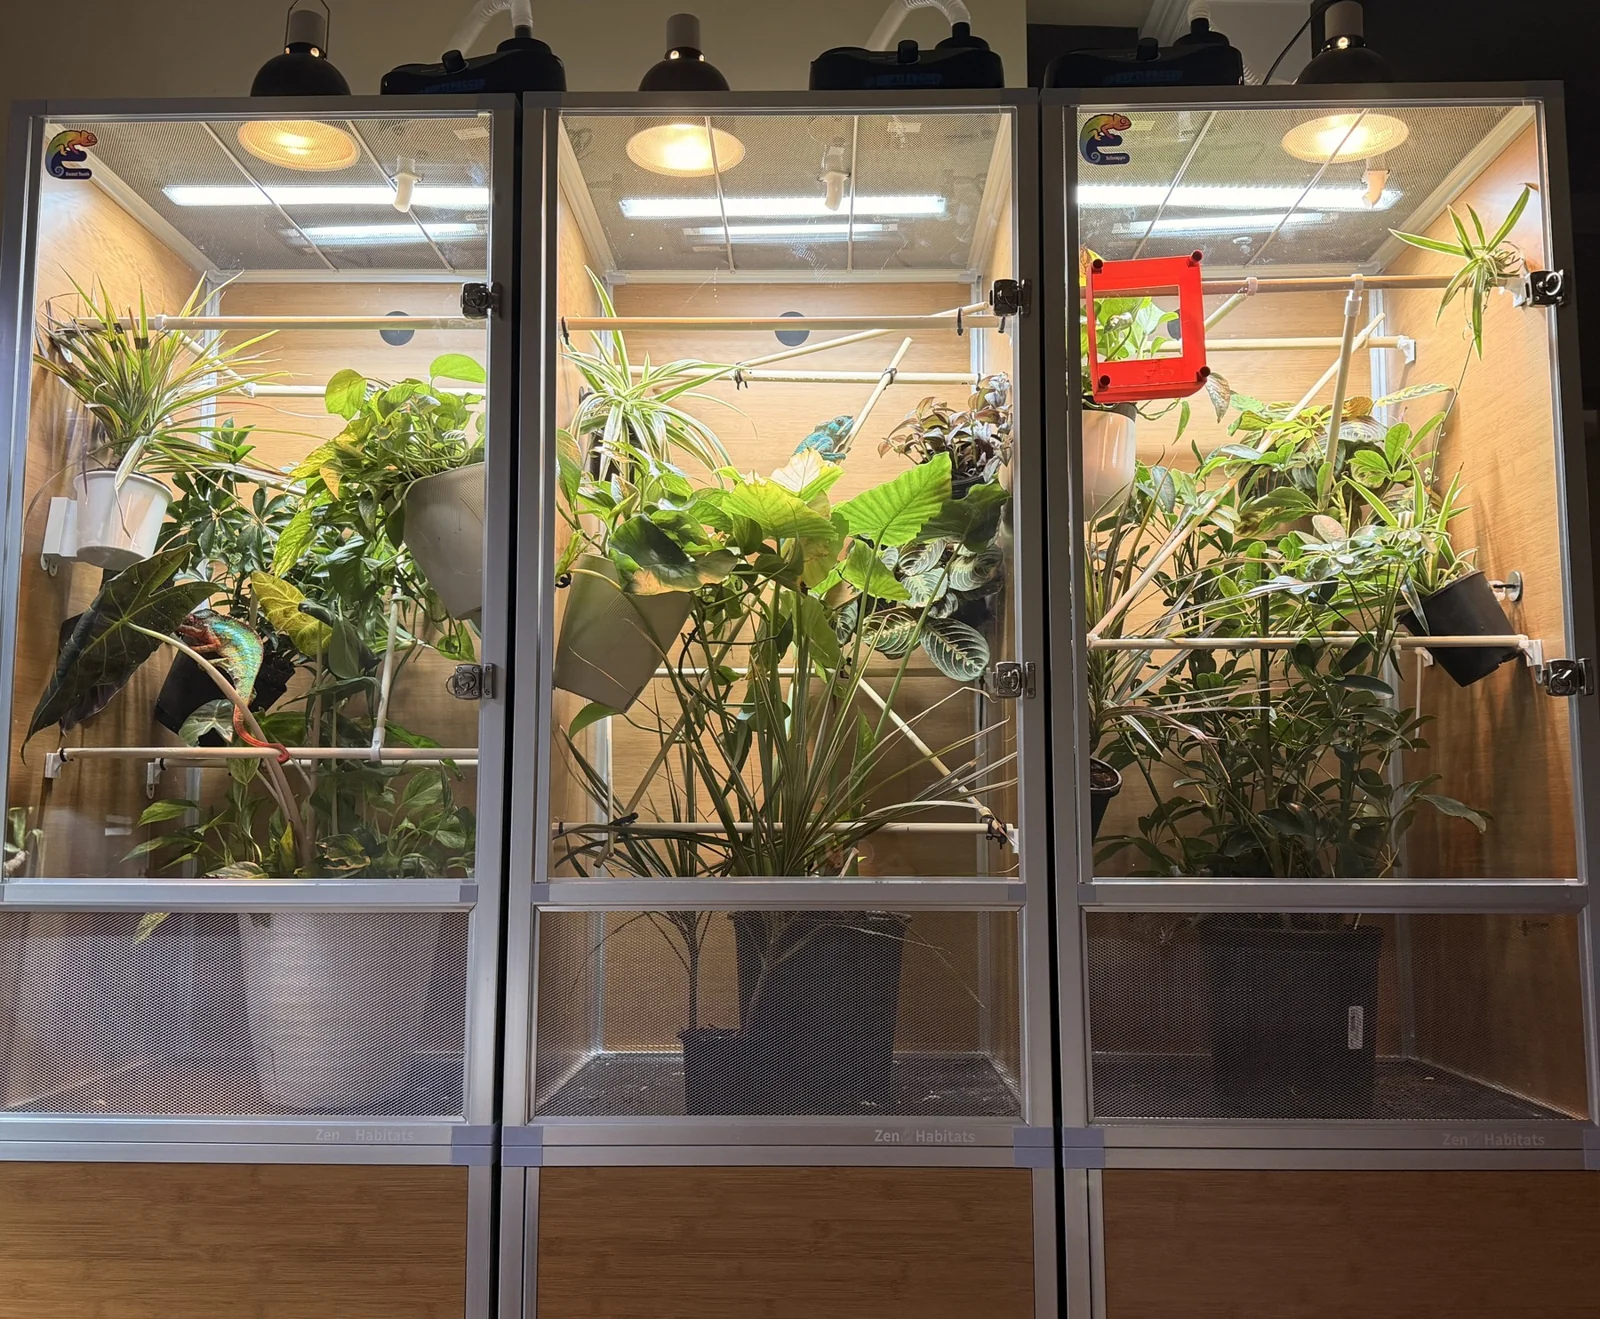
We use hybrid enclosures instead. Ours are configured like this:
- Screen top: full width, for airflow out and UVB in
- Screen lower front: a vent strip along the bottom of the front
- Solid PVC sides and back: holds humidity, blocks sightlines, waterproof
- Clear acrylic front door: visibility for you, no draft for them
That combination gives you humidity you can actually control and steady ventilation through the day. It is the single biggest upgrade most keepers can make.
Then get the whole thing up off the floor. Stand or mount the enclosure so the basking spot sits at least at your eye level, ideally higher. Height is safety to a chameleon: up in the canopy is where nothing can reach them. An enclosure on the ground puts your animal below every person and pet in the room, and it will spend its life on edge about it.
The Chimney Effect
This is the part that makes a hybrid enclosure work, and it is worth understanding rather than just copying.
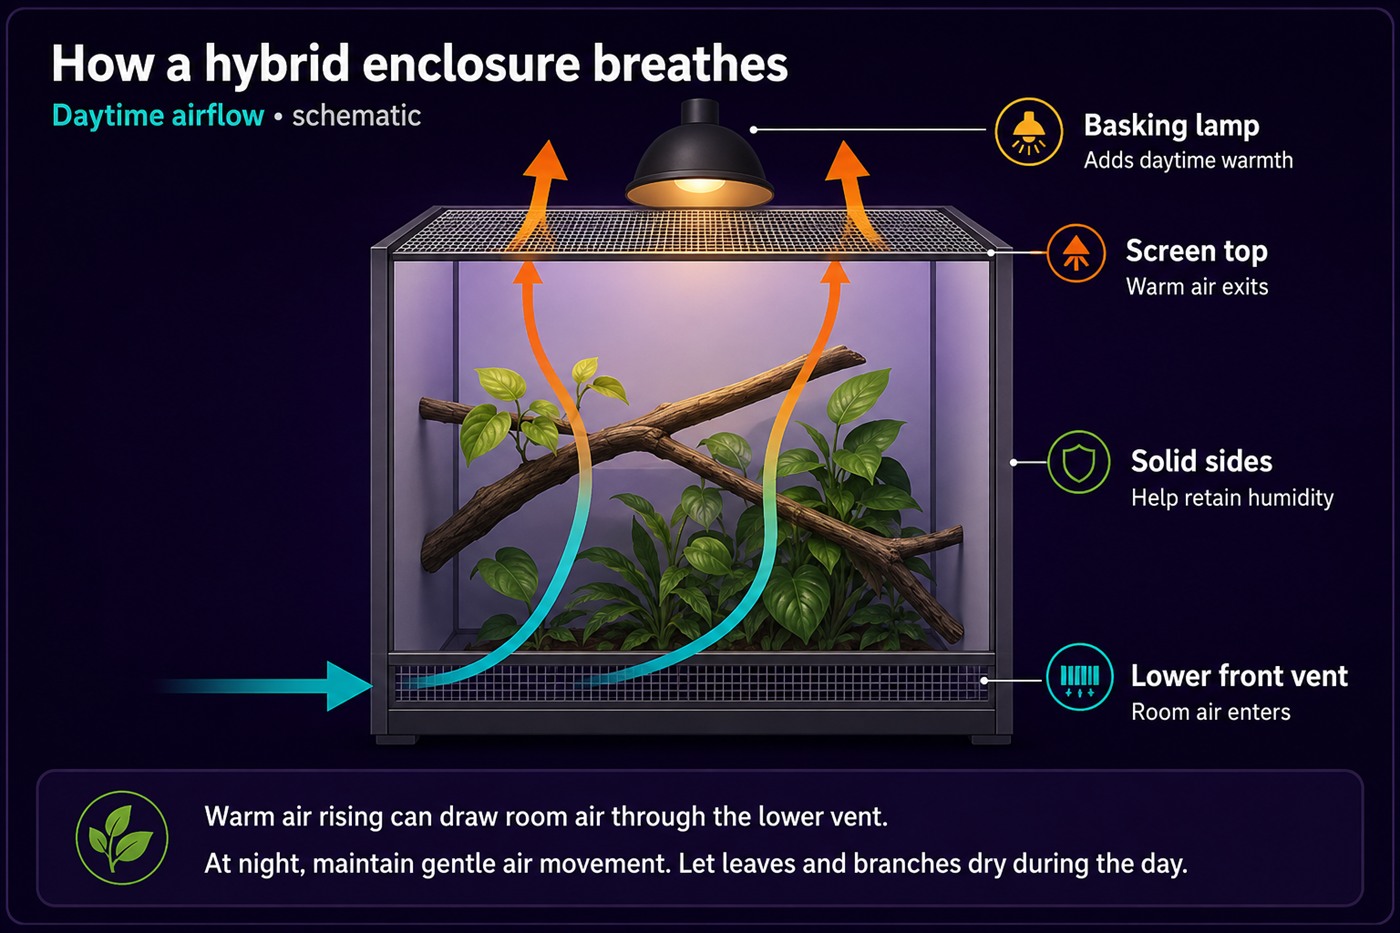
Your basking bulb warms the air at the top of the enclosure. Warm air rises and escapes through the screen top. As it leaves, it has to be replaced, and the only place air can enter is the screen strip along the lower front. So cool, fresh room air is drawn in at the bottom, travels up through the enclosure, and exits at the top.
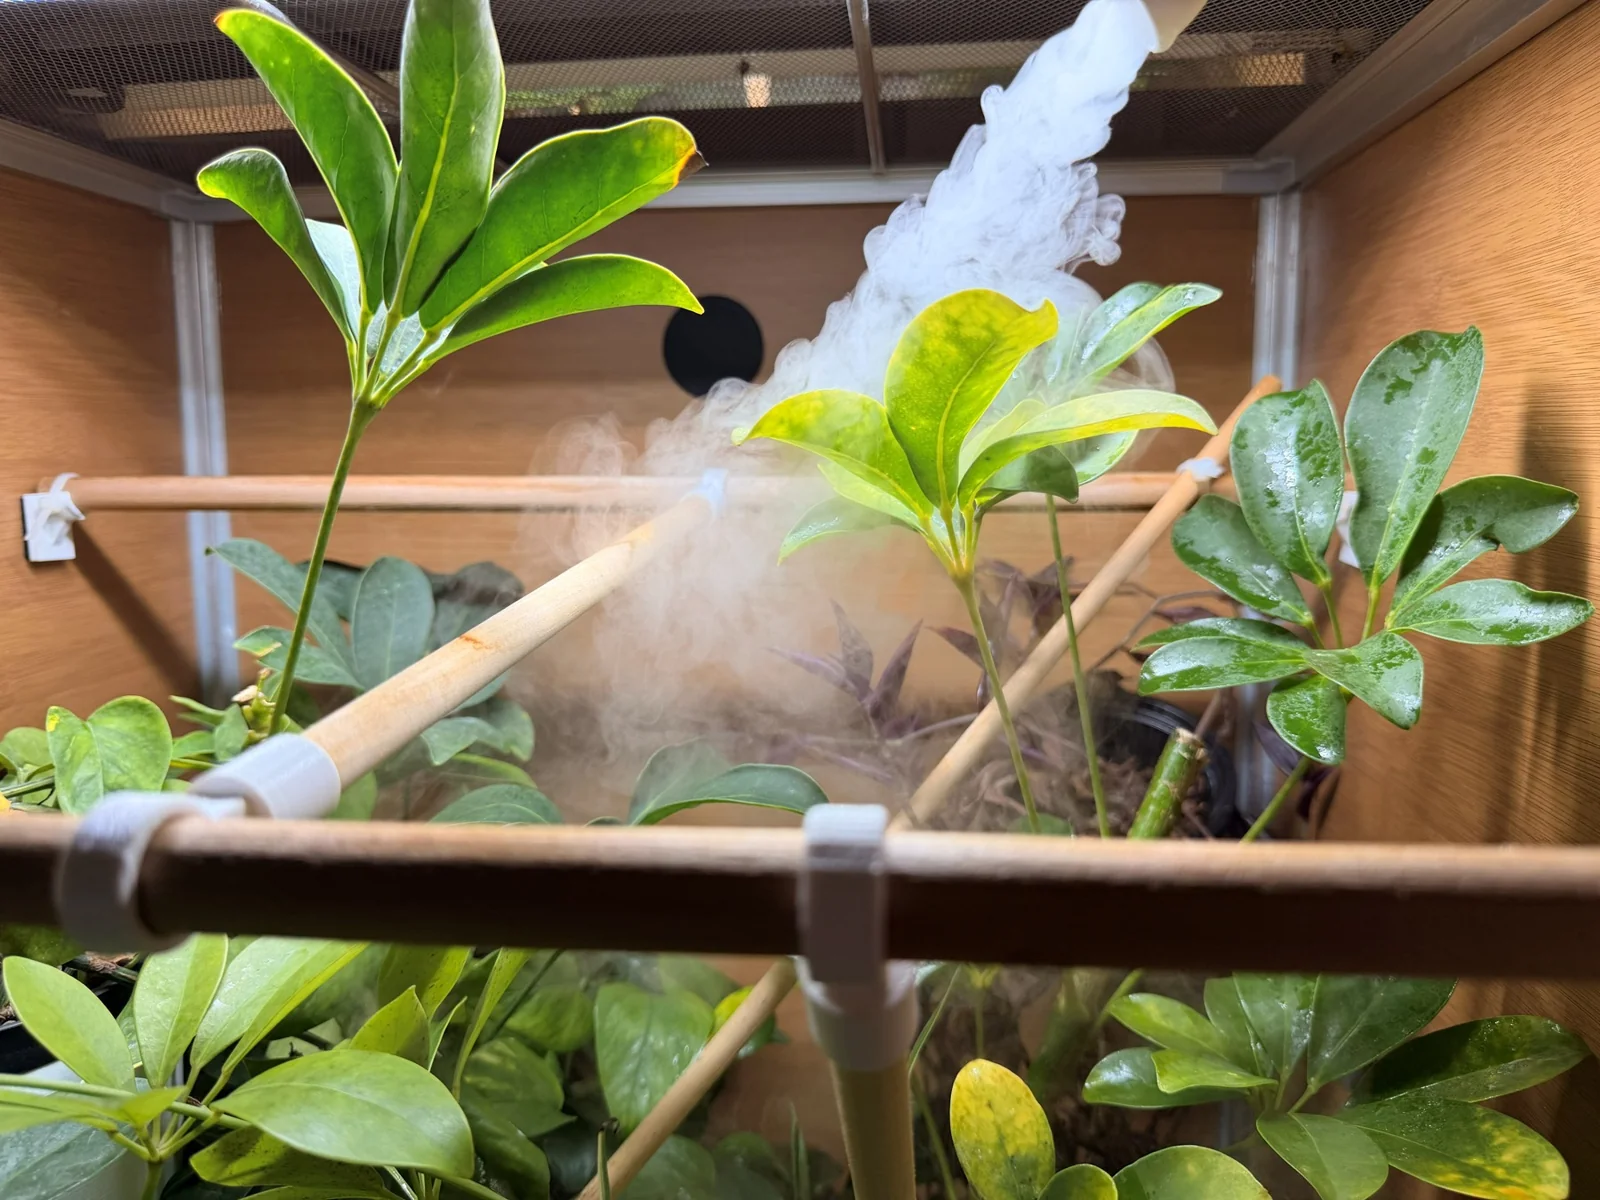
The result is a continuous, gentle current of fresh air that runs whenever your basking light is on, with no fan and no moving parts. Stale air does not sit while the lamp is on. Humidity from misting clears at a sensible rate instead of hanging around all day.
The chimney only runs while the lamp does. Switch the basking light off and the thermal driver goes with it, so how much your enclosure breathes overnight comes down to its design and the room around it. Keep gentle air movement going at night rather than sealing everything up.
Do not read morning dampness as a fault. High overnight humidity and droplets waiting on the leaves at dawn are exactly what you are aiming for, and the hydration guide sets out why. The test is what happens next: leaves and branches should dry out through the daytime. If the enclosure is still wet by the afternoon, that is when you need more ventilation.
The chimney can only pull in the air the room gives it. In a closed, still room it has nothing fresh to draw on, so an oscillating fan somewhere in the room, pointed away from the enclosure, helps more than people expect. You are keeping the room's air moving, not blowing air at your chameleon.
Do Not Block the Bottom Vent
It is tempting to seal the lower front strip to push humidity higher. Do not. Without an inlet at the bottom the chimney stops, and you have converted a well-ventilated enclosure into a stagnant box. Stagnant, permanently wet air is one of the conditions respiratory infections take hold in. If your chameleon is gaping, wheezing, or blowing bubbles, that needs a vet, not just a ventilation fix.
Sizing Your Enclosure
Height and width do different jobs, and you need both. Vertical distance is what buys you a real temperature and UV gradient, so there is a minimum height below which you simply cannot build one. Get that first. Then add width. Panther chameleons are arboreal, but they do not spend their lives climbing straight up and down: horizontal routes are how they actually move around, pick a basking spot, and get away from one. A tall, narrow box gives you the gradient and nowhere to go with it.
| Stage | Minimum size (W × D × H) | Notes |
|---|---|---|
| Sub-adult (from six months) | 24 × 24 × 48 in | The age ours go home at. Go straight to the adult enclosure and furnish it densely. |
| Adult female | 24 × 24 × 48 in | Same as the male, plus a lay bin in place from maturity onward. |
| Adult male | 24 × 24 × 48 in | This is a floor, not a target. Bigger is better. |
Females were long given a smaller minimum than males. We recommend the same 24 × 24 × 48 for both sexes: the extra cost and floor space are modest, and the gain in how she can actually live is not. Add width and horizontal routes wherever you can.
We would rather you bought the adult enclosure once. A six-month-old does perfectly well in a 24 × 24 × 48 provided it is properly furnished: dense planting through the lower two thirds, a continuous branch network, and a feeding station in a fixed place it can find every time. What a young chameleon struggles with is empty space, not floor area. An interim enclosure means buying twice and moving the animal twice, and it will outgrow the small one within months anyway.
Drainage
You are going to put a lot of water into this enclosure every day. Work out where it goes before you build, not after.
- Drainage tray: simplest option; a tray under the enclosure you empty by hand
- Plumbed drain: a bulkhead through the enclosure floor to a bucket or a drain line
- Drainage layer: for bioactive builds, a layer of clay balls or lava rock beneath the substrate
Whatever you choose, the substrate surface must never be waterlogged. Constantly saturated substrate goes anaerobic, starts to smell, and kills your cleanup crew.
Building the Bioactive Base
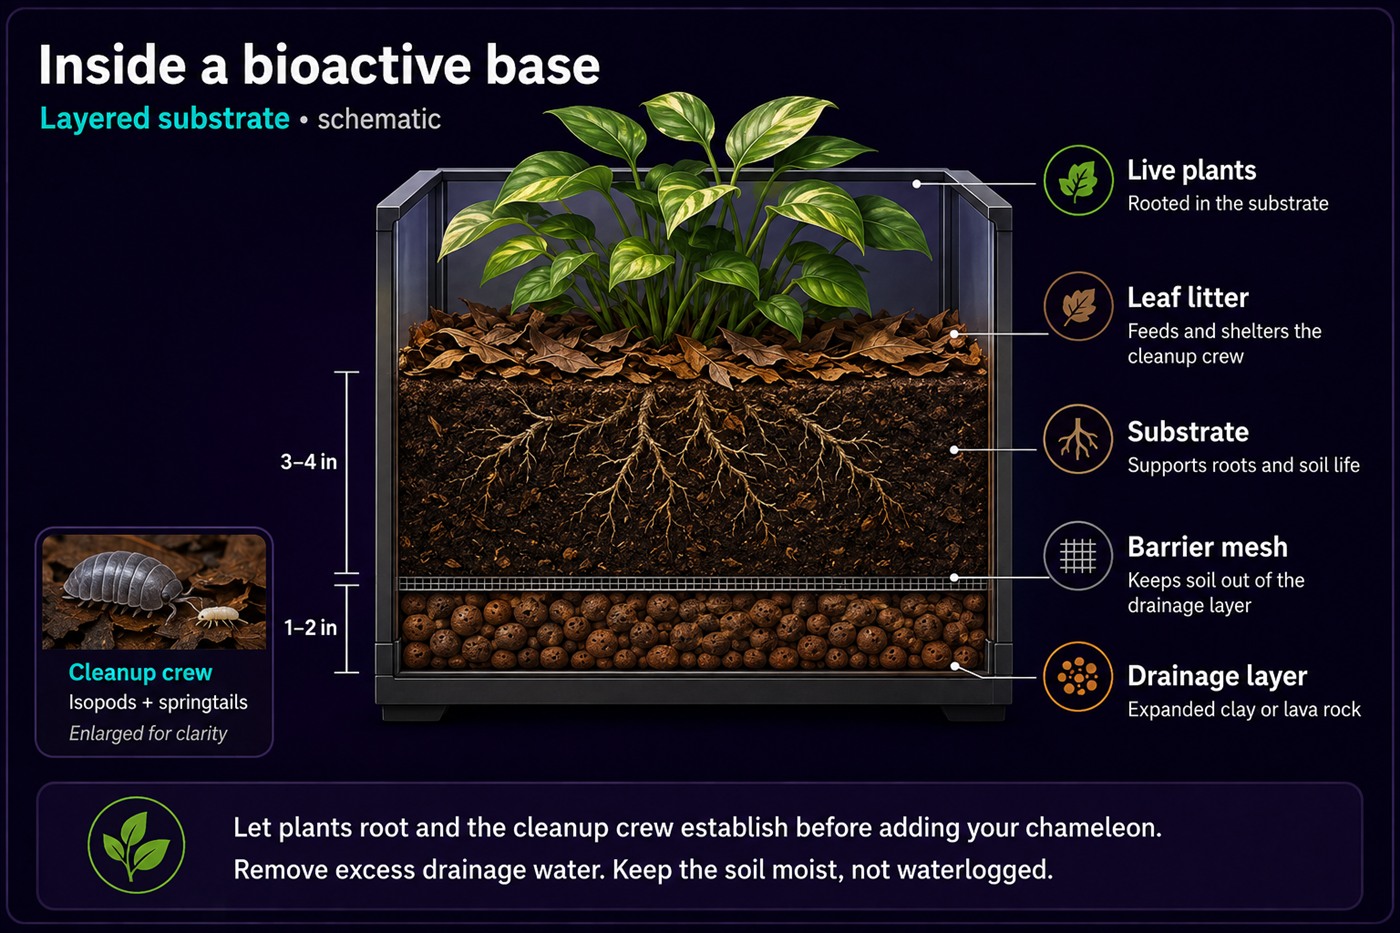
A bioactive enclosure is a small working ecosystem: live plants, live soil and a cleanup crew of invertebrates that break down waste. Done right it handles most of what lands in the soil, and the enclosure gets more stable over time rather than less. It does not make the enclosure self-cleaning: waste on leaves the animal drinks from, on the glass, and on the misting and fogging equipment is still yours to deal with.
Urates and droppings are the ones to stay on top of. A cleanup crew will work through what reaches the soil eventually, but anything sitting on a leaf, a branch or the glass needs picking out by hand, and that means looking for it rather than assuming the enclosure has handled it. Do a proper sweep every few days.
Layered from the bottom up:
- Drainage layer: 1–2 in of expanded clay balls or lava rock
- Substrate barrier: mesh or screen so soil does not wash into the drainage layer
- Substrate: 3–4 in of an organic topsoil, coco fiber, sphagnum and sand mix, with no fertilizer or perlite. We use The Bio Dude's Terra Firma and have had no reason to look further.
- Leaf litter: a covering layer that feeds and shelters the cleanup crew
- Cleanup crew: springtails and isopods, added a few weeks before the animal
Let It Establish First
Build the bioactive base and let it run for at least two to four weeks before an animal moves in. The plants need to root, and the cleanup crew needs time to establish a population. A bioactive setup added the same week as the chameleon is just dirt.
Plants
Live plants do real work: they hold humidity, provide cover, give drinking surfaces for mist droplets, and give your chameleon somewhere to feel hidden. Fake plants do none of that except the last one.
Safe, hardy species we use:
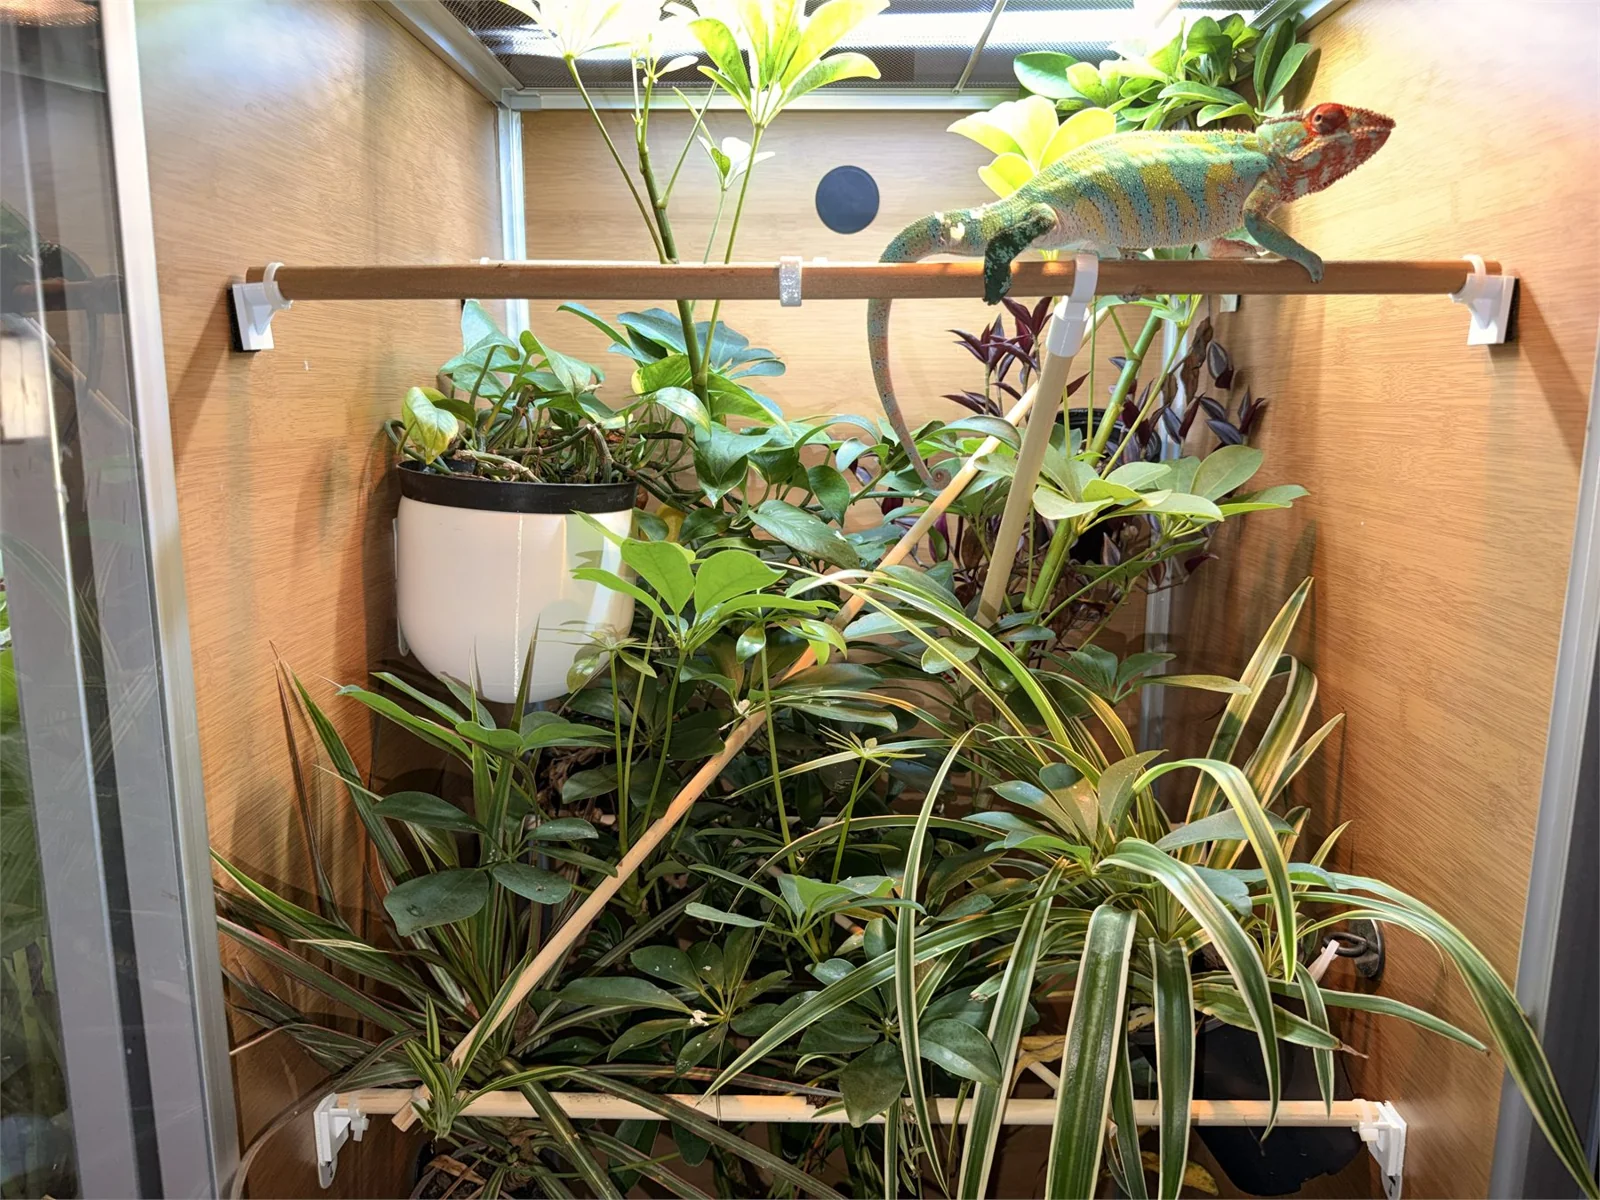
- Schefflera (umbrella plant): our go-to. Sturdy stems chameleons can walk along, and it takes the abuse.
- Pothos: nearly indestructible, climbs, big drinking leaves
- Ficus benjamina: classic chameleon plant, dense cover
- Spider plant: tough, tolerant, good lower-level fill
- Tradescantia: fast growing, good ground cover, useful color contrast
Buy plants with a known treatment history. This matters more than anything you can do to a plant once you get it home. Nursery stock is routinely treated with systemic pesticides, and systemic means exactly that: the compound is inside the plant's tissue, not sitting on the leaf. You cannot wash it off, and some persist for months. Any "leave it a few weeks and it will be fine" rule is a guess.
Buy from a supplier who can tell you how the plant was grown. Reptile-focused suppliers like The Bio Dude sell plants intended for exactly this use, and we have bought from them ourselves. A local grower will usually tell you straight if you ask what they spray.
Wash and repot whatever you buy regardless. It removes surface residue and gets rid of nursery soil that may itself be treated, and it is worth doing. Just be clear about what it does and does not solve: if you use a plant of unknown history from a general nursery, you are accepting a risk you cannot rinse away.
Branches and Furnishing
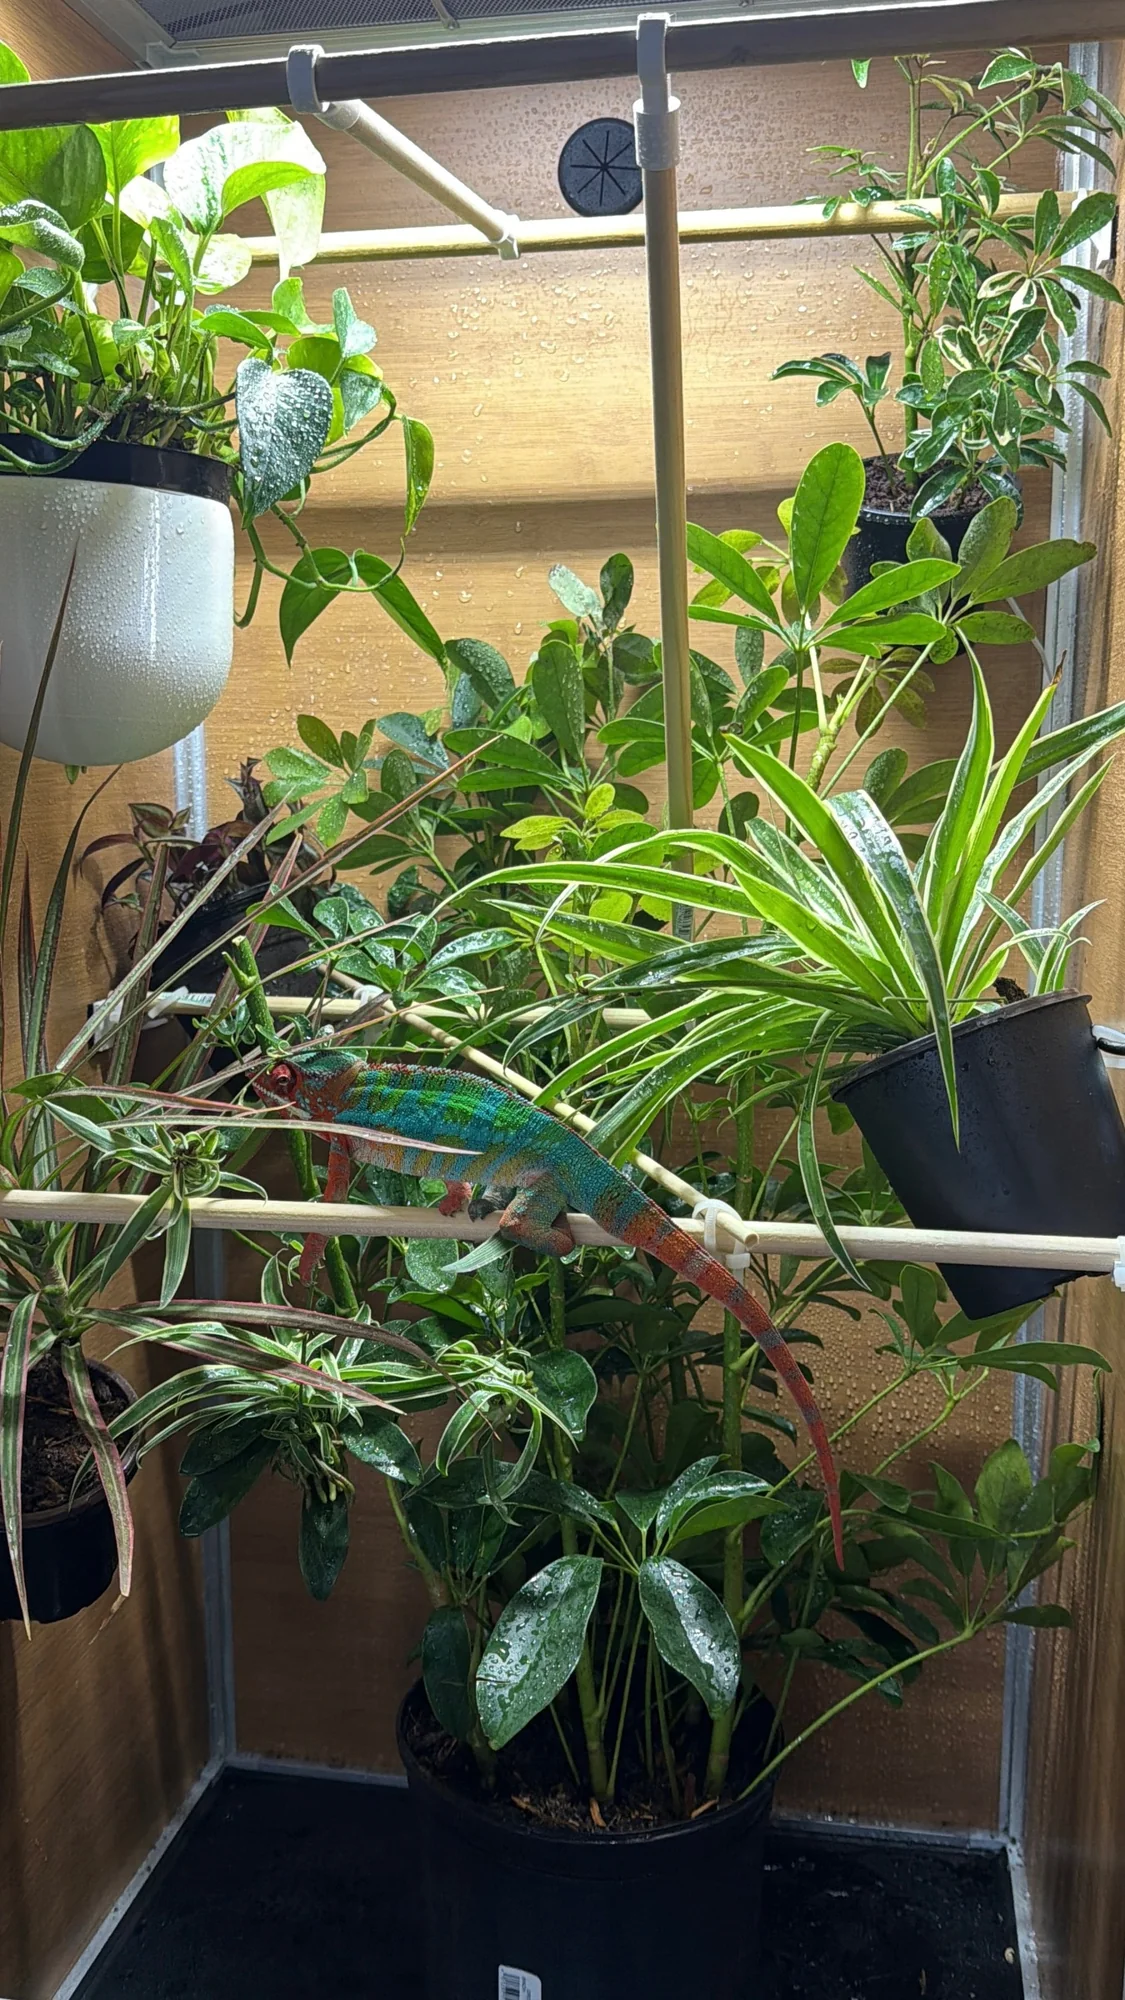
Your chameleon should be able to get from the basking branch to the enclosure floor without ever touching glass or screen. Build a continuous network.
- Vary the diameter. Perches should let the feet grip most of the way around. A mix from pencil-thin to thumb-thick keeps their grip strength up.
- Vary the height. They thermoregulate by moving. Give them a real vertical range of temperatures to choose from.
- Horizontal beats vertical. Most resting and basking happens on horizontal or gently sloped branches.
- Build the forest edge. We plant the bottom two thirds densely and leave the top third open, with branches for basking but no foliage. That is the structure a chameleon actually uses: cover to disappear into below, clear routes and open basking above.
- Leave a basking approach. A clear route up to the basking spot, and shaded branches nearby to retreat to.
Wooden dowels, cork bark, natural hardwood branches and commercial vines all work. If you collect branches outdoors, choose a non-toxic hardwood, scrub them, and bake or freeze before use.
Common Mistakes
- Sealing the bottom vent. Kills the chimney effect and causes respiratory problems.
- A big enclosure that is bare. The size is not the problem; empty air is. Plant the lower two thirds densely and give your chameleon a feeding station it can reliably find.
- Ignoring drainage. Waterlogged substrate goes anaerobic within weeks.
- Assuming you can wash a systemic pesticide off. You cannot. Buy plants whose treatment history you know.
- Sparse furnishing. A bare enclosure with two dowels is a stressed chameleon.
- Enclosure at floor level. Being looked down on is stressful. Raise it so the basking area is near your eye level.
- Loose substrate with no bioactive system. If you are not going bioactive, run bare-bottom instead. Loose substrate alone is an impaction risk.
Sources for This Guide
The specific articles behind the recommendations on this page. We have read them, and if you want to go further than this guide takes you, they are where to go next.
- What Chameleon Cage Should I Get?, Bill Strand, Chameleon Academy
- Minimum Female Chameleon Cage Size, Bill Strand, Chameleon Academy
- Cage Size for Hatchling Chameleons, Bill Strand, Chameleon Academy
- Bioactive Enclosure Build Guide, Bill Strand, Chameleon Academy
- Maintenance: Cleaning Your Chameleon Cage, Bill Strand, Chameleon Academy